

Coffee Cupping 101: What It Is and How to Do It at Home
Published by SpecialityCoffee.ca
Introduction: What Is Coffee Cupping (and Why It Matters)
Coffee cupping is the standardized method used by coffee professionals worldwide to evaluate quality, compare coffees, and make purchasing decisions. While it may seem technical or intimidating, cupping is actually the most honest and unfiltered way to experience coffee.
Unlike brewing methods that introduce variables such as filters, pressure, or technique, cupping removes complexity. It allows the coffee itself — its origin, processing, and roasting — to fully express its character.
For home coffee enthusiasts, learning how to cup coffee is one of the fastest ways to:
-
Understand flavor differences
-
Improve buying decisions
-
Train your palate
-
Appreciate specialty coffee more deeply
What Is Coffee Cupping?
Coffee cupping is a controlled tasting process where ground coffee is steeped directly in hot water without agitation or filtration. After brewing, the crust is broken, aromas are evaluated, and the coffee is tasted with a spoon.
Cupping is used to:
-
Evaluate green coffee quality
-
Compare roast profiles
-
Identify defects
-
Describe flavor notes consistently
Its simplicity is intentional, ensuring that nothing interferes with the coffee’s natural character.
Why Cupping Is Different from Brewing
Traditional brewing methods influence extraction through:
-
Grind size
-
Water flow
-
Filter type
-
Pressure
-
Brew time
Cupping removes these variables. Each coffee is:
-
Ground the same way
-
Brewed the same way
-
Tasted the same way
This makes cupping ideal for objective comparison.
Who Uses Coffee Cupping?
Cupping is used by:
-
Coffee producers
-
Green coffee buyers
-
Roasters
-
Quality control teams
-
Competition judges
-
Informed consumers
In recent years, cupping has become more accessible to home coffee drinkers who want to deepen their understanding.
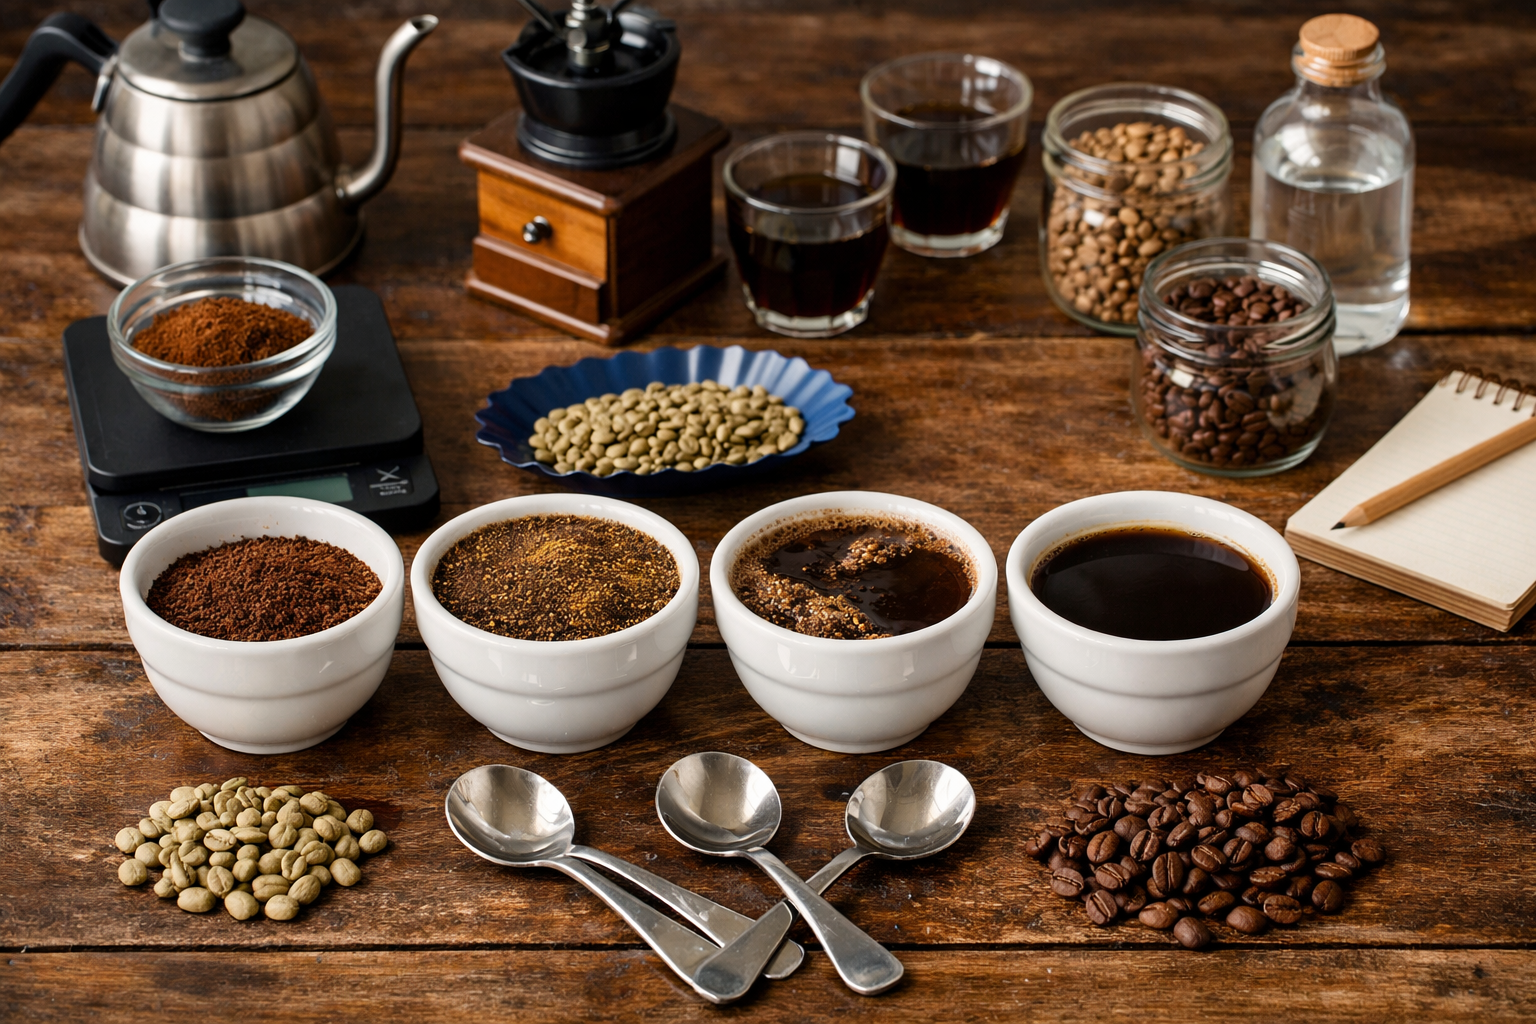
What You Need to Cup Coffee at Home
You don’t need professional equipment to get started.
Basic Equipment
-
Freshly roasted whole bean coffee
-
Burr grinder
-
Scale
-
Kettle
-
Bowls or cups (identical if possible)
-
Spoons (tablespoons or cupping spoons)
-
Timer
Optional but Helpful
-
Tasting notebook
-
Flavor wheel
-
Filtered water
Consistency matters more than perfection.
Coffee-to-Water Ratio for Cupping
The standard cupping ratio is:
8.25 grams of coffee per 150 ml of water
This ensures a balanced and consistent extraction across all samples.
Use the same ratio for every cup.
Step-by-Step: How to Cup Coffee at Home
Step 1: Grind the Coffee
Grind slightly coarser than pour-over, similar to coarse sand.
Immediately smell the dry grounds and note:
-
Floral
-
Fruity
-
Nutty
-
Chocolatey
-
Spicy
Dry aroma provides early clues about quality and freshness.
Step 2: Add Hot Water
Heat water to approximately 93–96°C (200–205°F).
Pour water directly over the grounds until the cup is full.
Start your timer.
Do not stir.
Step 3: Smell the Crust (After 4 Minutes)
After four minutes, a crust forms on the surface.
Lean in and inhale deeply. This moment often reveals:
-
Peak aroma intensity
-
Sweetness
-
Fermentation notes
-
Potential defects
Step 4: Break the Crust
Using a spoon, gently break the crust by pushing it away from you while inhaling.
This is one of the most aromatic moments of the session.
After breaking the crust, remove any foam and remaining coffee particles from the surface.
Step 5: Let the Coffee Cool
Wait an additional 5–10 minutes.
Coffee flavor changes with temperature. Cupping involves tasting throughout the cooling curve, which helps reveal balance and defects more clearly.
Step 6: Taste the Coffee
Using a spoon, slurp the coffee forcefully so it sprays across your palate.
This aeration allows aromas to reach your nose and enhances perception.
Taste multiple times as the coffee cools.
What to Evaluate During Cupping
Aroma
-
Clean or dull?
-
Expressive or muted?
Acidity
-
Bright and pleasant?
-
Sharp or harsh?
Sweetness
-
Honey-like?
-
Brown sugar?
-
Absent?
Body
-
Light and tea-like?
-
Creamy?
-
Heavy?
Flavor
-
Clear and distinct?
-
Muddy or confusing?
Aftertaste
-
Clean and lingering?
-
Bitter or drying?
How to Identify Quality
High-quality coffee typically has:
-
Clean, pleasant aroma
-
Natural sweetness
-
Balanced acidity
-
Clear flavor notes
-
No harsh bitterness
Low-quality or defective coffee may taste:
-
Astringent
-
Phenolic (medicinal, plastic-like)
-
Flat
-
Simultaneously sour and bitter
Cupping reveals these differences clearly.
Common Coffee Defects You May Encounter
-
Fermented: vinegary, overly sour
-
Phenolic: medicinal, plastic-like
-
Baked: flat, lifeless
-
Smoky: overly roasted character
Recognizing defects improves buying confidence.
Side-by-Side Coffee Comparison
Tasting multiple coffees at once is the most effective way to learn.
Try comparing:
-
Different origins
-
Washed vs. natural processing
-
Light vs. medium roast
-
Coffees from different regions (e.g., Ethiopian regions)
Differences become much more obvious when tasted together.
Taking Notes Without Overthinking
You don’t need complex vocabulary.
Simple descriptors work:
-
Sweet
-
Bright
-
Fruity
-
Clean
-
Heavy
-
Bitter
Over time, your vocabulary will naturally expand.
Why Cupping Improves Everyday Brewing
Cupping trains your palate to recognize:
-
Sweetness
-
Balance
-
Extraction issues
This helps you better adjust grind size, brew ratio, and water temperature at home.
Why Specialty Coffee Is Ideal for Cupping
Specialty coffee is:
-
Free from major defects
-
Freshly roasted
-
Transparent in origin
This makes it easier to perceive nuances and understand why coffees taste different.
Final Thoughts: The Fastest Way to Learn Coffee
You don’t need to be a professional to benefit from cupping. Even occasional practice at home significantly improves your ability to:
-
Taste objectively
-
Buy with confidence
-
Brew better coffee
Cupping transforms coffee from a routine into a skill — making every cup more meaningful.


%0ACoffee%20cupping%20is%20the%20standardized%20method%20used%20by%20coffee%20professionals%20worldwide%20to%20evaluate%20quality,%20co...)